Passionaltycrafty

Wednesday, February 27, 2013

Design Team Project "Teddy Bears"

I made this card a while back when a wonderful friend and coworker was moving far away. I changed it up to fit the request for this project.


I took a card base I had from an earlier project and a sweet picture I copies with my printer and framed the picture with green, yellow and orange. Then I found some left over ribbon from a fall project and glued a strip to my card. I then made a bow with the same ribbon and tied it together with some sheer yellow ribbon and cut it of at angles. I then made a bouquet of flowers using the paper quelling technique and attached them to a small piece of paper with glue dots. I trimmed the paper so you don't see much of it and then attached it to the center of my bow with more glue dots. then


I printed and cut out the phase and framed it with orange and black and used foam squares to attach it to the left bottom of the card. I love this one! My granddaughter snatched it as soon as she saw it. Everything for this card was created with left over supplies.


This is me again recycling. I love it!
Marye Bird
passionatlycrafty.blogspot.com

Monday, February 25, 2013

Fun Project for a Special Gift

This is the craft that we created for Feb. Craft & Crop. I created the picket fence box from page 45 of the Cricut cartridge "Wrap It Up". After the ladies glued it all together we ran some ribbon through the picket fence and ending up in the middle of one side of the picket fence, we tied the ribbon in a knot. Some did a bow.


I found a flat of these miniature Daffodils and gave one to each of the ladies who came as a gift to add to their little box. It looks so cute! And they loved it.


Then I created a scalloped circle with a fiskar's paper punch out of plan green card stock and another one smaller with green glitter paper, layered them on top of each other. Then I cut a clover from my favorite cartridge, Paper Doll Dress Up, and attached it to the center with a foam square to give it that 3-D look. Then topped it off with a green pearl sticker. I punched a whole at the top of the plan green circle and ran some ribbon for decoration.


On the back I attached a miniature clothes pin so you can take it off the planter and wear it on St. Patrick's Day because you know if you forget to wear green that day you will get a pinched by everyone who notices.
You could make this cute box in bright pastels for a Easter center piece or gift for someone at work or close friend. Add some Easter grass and a couple of plastic eggs with goodies inside. They would be  a big hit. I thought about making them for my Sunday school class. Wouldn't that be fun!
I hope you like this project and try it for yourself.
Marye Bird
passionatlycrafty.blogspot.com


Thursday, February 21, 2013

It's Your Birthday! Just-a-scrappin Design Team Project

This is for Linda, over at Just-a-scrappin. Happy Birthday Linda
She loves blue, and ribbon and bling! So I created this cute and very easy to do card just for her.


I cut this cute card from my Cricut Events cartridge called "Bridal Shower" I love the decorative top edge.


I just purchased this K&company two sided paper pack on clearance at my Jo-Anns', called "Poppy Seeds"

I cut a  square of the blue patterned side 1/4 inch smaller then the card.Then I turned the paper over and cut another square 1/4 inch smaller and layered that in center of the  blue, Then I took a scrap of the paper and free cut around one of the flowers and used a circle stencil to cut a circle slightly larger then my flower, and used the same scrap to cut out just the center of the flower. I attached the circle with glue and then used foam squares to attach the flower and again to attach the center of the flower and I added a large glitter sticker to the center of that. I printed out a sweet quote "I am so glad it is your Birthday. I have another year to get to know you better." I attached the quote to my same scrap of paper, cut a frame around it and attached it to a solid blue scrap and cut a frame around it. I used a foam square cut in half put half on each end and attached it to my card. I has some pretty sheer blue ribbon I wrapped around and tied in a bow. I cut a square piece of the opposite side of the paper and attached it to the inside of my card so that it hung over a little and showed through when the card is shut. It came out so sweet. I hope Linda likes it, and I hope you like it too.
Marye Bird
passionatlycrafty.blogspot.com

Wednesday, February 13, 2013

Design Team project for February 14th

The Just-a-scrappin Design Team was asked to create a Valentine project. Anything goes but no red. This is a card that we just did for Januarys' Craft & Crop Night at Jo-Anns'.
This cute gate fold card has a two layer band around it. Then a pretty white ribbon and in the center is a bunch of hearts, two layered circles and a white pearl sticker.

When you take off the decorative band, the inside has a pink layer in center of the grey card and a 1/4 inch smaller white piece of card stock that I have stamped along the bottom. This card was created for a class I was doing at Jo-Ann's. I thought it was different.

The band was created from a dark pink strip of card stock and them I took another light pink strip and stamped both sides and then free cut around the hearts. Then the heart bouquet was created using the same stamp from Inkadinkado. It is a double heart design. The pigment ink was from Hampton art.
This was different for me because I don't work much with stamps so this was a fun learning experience for me. Hope you liked it.
Marye Bird
passionatlycrafty.blogspot.com

Here is our February Card project.

I just love this Irish Blessing I found on line. I don't really believe in luck although I am Irish. But I do believe through prayer God will bless us. So, I used this Irish Blessing or Prayer for the focal point of our St. Patrick's Day card.
I cut this cute card base from Cricut cartridge "Bridal Shower" (events cartridge). It has this lace look that I love. I framed the Irish Blessing prayer a couple of times. I found some cute clover ribbon at Jo-Anns' and attached it down the side next to that cute lace cut on front of the card.


Then I used Paper Doll Dress Up (one of my most used and favorite cartridges) and cut the clovers out of green and green glitter paper (also used on the framing), and layered the larger and one small one and then put two small ones and added green pearl sticker beads. The clovers were attached with foam squares. I cut them in half which works fine and saves money. You girls know I am all about saving money.


Here is the card and the envelope that you can cut from this same cartridge. It also has that cute lace edge. I did not show the inside, but I took some patterned green paper and cut 1/4 inch smaller than the inside of the card and it shows up behind the lace cutout (very cute) than I cut a piece of white card stock and made sure it did not hang over and show through the lace. And I used that for the space to put your own words. I added an large and small cover to the left top of the inside to top off this adorable card. I really had fun with this card. I hope you love it.
Marye Bird
passionatlycrafty.blogspot.com

February "Craft & Crop"


Ok, I know you ladies are waiting to see what we will be working on for February and here is the pages. Remember we work a month in advance, so we will be doing our St. Patrick's Day page and I have not yet finished the craft and card yet. But as soon as I do I will post it.

 I was inspired by this wooden wall plaque I found at Jo-Ann's in the seasonal section. I came home and starting thinking of ways I could recreate this cute Angel using my Cricut and other supplies I had on hand. And her it is. It came out so cute.

I used some glitter paper I thought I would never use. I used my favorite Martha Stewart punch, I had to draw freehand the angels dress I could not find a similar cut in any of the cartridges I owned. I cut white clovers and used my Sizzix Texture Boutique and textured them and then used an ink pad of green for one and rust for the one hanging from the angel. I used green around the phrase "Irish Blessings" and punched holes in each hand and the clover, ran a string through all and used a green bead to keep the string from pulling through. I took the scraps from the glitter paper and cut the diamond shape designs out and glued them along the bottom of the dress. She has a halo of white glitter paper and I used scraps for the trim on her sleeves.
I used green ink around the phrase "Irish Blessings" and punched holes in each hand and the clover, ran a string through all and used a green bead to keep the string from pulling through. I took the scraps from the glitter paper and cut the diamond shape designs out and glued them along the bottom of the dress. She has a halo of white glitter paper and I used scraps for the trim on her sleeves. She has goggle eyes and a sheer ribbon bow at the neck.
 
 
Page two, I used some last years clover ribbon that was just waiting in my ribbon box. I made a smaller version of the angel head, hair and sleeves, attached them above the picture frame. I found this darling Irish Blessing and framed it a couple of times. Cut out letters for St. Patrick's Day and framed it and them placed the other white clover.


Here is a view of the hanging clover


Here is a view of the smaller angel over the picture frame on page two.

I hope you enjoyed it as much as I 
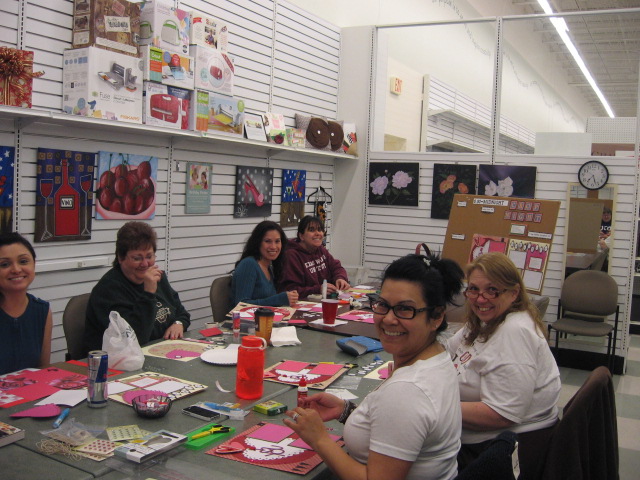
did creating it. Join me and the other ladies at February's "Craft & Crop" at Jo-Ann's in Hurst. It is across from the North East Mall. You can sign up over the phone if you can't get in. But remember the spots go fast and they are limited. Hope to see you there.

Marye Bird

Passionatlycrafty.blogspot.com

Visit me often. You can even follow me if you like.


January "Craft & Crop" at Jo-Anns'

 
Januarys' "Craft & Crop" was so great! I wanted to share a couple photos. This is the new education classroom at my Jo-Ann's in Hurst. and we take up the whole room.
 
Here are some of the ladies who love to join me here once a month to create a two page scrapbook kit that I create for them.
 
 We also will put together a card for the same theme for that month.


 The ladies also get to create a craft that goes with what ever theme we are working on. We have so much fun.

 Each lady brings a dish that they want to share with everyone. Some will print the recipe so if you really enjoyed a dish you can recreate it at home. We all have fun visiting with each other. When they are finished with crafts we can go shopping. The store closes at 9:00pm and we are there till 11:45pm so they have the store to themselves and enjoy walking around together shopping with no lines to stand in, we treat them like royalty. You can come and be a fun part of the evening. Call and sign up spaces are limited. The next date is , Saturday February the 23rd. 6pm-12am. Hope to see you then!
Marye Bird
passionatlycrafty.blogspot.com
 

Wednesday, February 6, 2013

Valentine "Craft & Crop" pages

I could not get my blog to post photos when it was time to share this page, but I wanted to share it anyways. This was the free page kit that was given to all who attended our once a month "Craft & Crop" for January at Jo-Ann's in Hurst.


Hope you enjoyed this one too.
 
Marye Bird
passionatlycrafty.blogspot.com


" Love Is In The Air"

This is the the theme for our next Just-a-scrappin Design Team project.
I just created this Valentine card for my ladies for our Valentine "Craft & Crop" night at Jo-Ann's. They loved it, hope you like it to. You can change it up to what ever design you like.


This is a Gate fold card with a elegant double band around it.


 Inside is a pink and white frame where you add your message. Stamping was added to the bottom of the white layer before it was added to the card.


The band has two layers. The first layer of dark pink was folded around the card and glued . the second layer is lighter pink and slightly thinner and the heart stamp was applied across the bottom and turned and applied to the top also. Then just free cut around the hearts as shown here. Now fold it around the dark pink band and glue. A piece of ribbon of your choice is added around the whole band and glued. Then for the center it is 5 of the heart punches glued on a small circle and then the gray and pink circles were added and finished with a pearl. This cool stamp is from Inkadinkado it is a double heart design and the pigment ink pad is from Hampton art. This is a class you can take at Jo-Ann's for February there are a couple of other crafts done in this class too. Check it out. Saturday during Open House you can get the class at 50% off. Hope you enjoyed this project. I enjoyed creating it. I have not worked much with stamps so this was fun for me. Thanks for joining me again.
Marye Bird
passionatlycrafty.blogspot.com